Your Cart is Empty
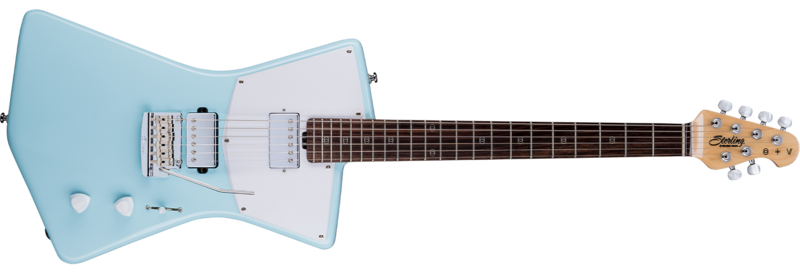
Setting Up an Electric Guitar


Guitars are as individual as the people who play them so to make sure that your guitar is not only at its optimum when it comes to playing, but comfortable and suited to your own personal needs. Think of it as having bought a car - yes, the major work is done for you but even if brand new you still need to adjust the seat and find the perfect angle for the wing mirror. This fine tuning of the hardware is known as “setting up.” New guitars will come with a factory set up but as this is done from a “one size fits all” ethic, you will still need to make your own adjustments. Second hand or pre-used guitars will also need adapting to its new owner's personal preferences and perhaps even be adapted to accommodate a history of wear and tear.
Before you start to set up an electric guitar, there are a few checks that you need to do, to determine what just what the set up will entail.
- Ensure that the guitar has a fresh set of strings on it, this will help you gauge any sound problems by eliminating the sound issues that may simply be the result of old strings which don’t stay in tune. New guitars will come with new strings, which may take a while to settle in and bear in mind that second hand guitars, even if bought from reputable shops, may have had those strings fitted a long-time ago.
- Check the action of the guitar. The action is the height of the strings from the frets and pickups. This will not only affect the sound but also your playing comfort.
- Visually check the height of the strings as they meet the bridge and the saddle.
- Play the guitar. The bottom line is that this is your guitar and should be set up the way best suits your needs. You can check any number os lists and how to guides but the factor that overrides all others is, does this feel right to you?
Once you have run through this check list and mentally noted the various aspects of the job before you, it is time to go to work.
Step 1 - New Strings
Strings are often overlooked by players, somehow secondary to the mechanics and electrics that are going on inside the guitar but it should not be forgotten that it is the act of the player hitting the strings which is the source of the sound. You can manipulate, amplify, distort and subject it to numerous other changes but this is the start of the process. For that reason, the strings that you use and the way you put them on to the guitar are vital to your finished sound. It may take a while to find the strings that work best for you but that is all part of your personal learning curve and you will have many discussions with fellow players as to preferences and results, but it is through this trial and error process that you will understand more about your instrument, acoustics in general and yourself as a player.
Having bought your strings and removed the old set proceed as follows. Thread the string through the bridge and place it in the nut, then measure about two machine heads worth of string away from the machine head you want to place the string on to and bend it at a 90-degree angle. Tighten the machine head while pressing the string down onto the headstock, you should get about three wraps around for the bottom E string and will gradually get more the thinner the string gets. Cut off any excess string, this stops the excess string hitting the other strings and affecting the sound. This will also give your string a professional look. You now have to tune the guitar up so you can see what needs to be done on the rest of the guitar.
Step 2 - The Truss Rod
The Truss Rod is a pole which runs down the inside of the guitar neck and is used to ensure its straightness or flatness and can be adjusted to compensate for any other issues. Truss rods often require adjusting after changing string gauges or when temperature and humidity change the amount of bow in the neck. As you tighten the truss rod the neck will flatten and give you lower action, and if you loosen the truss rod your neck will give you more relief, raising the action.
How to Adjust the Truss Rod
Although it may seem like a major alteration, it is fairly simple to adjust your truss rod and the point of adjustment is generally found either where the headstock joins the neck or the neck joins the body of the guitar. You will have to make sure that your new strings are in tune and you will have to work out if you need to tighten or loosen your truss rod. If the gap between your strings and frets is too high you will have to tighten your truss rod (turn it clockwise), or if your strings buzz or touch your frets then you will have to loosen your truss rod (turn it counter-clockwise). This will take a few tries and you will have to keep checking if your strings are still in tune. Adjusting the truss rod will help you to get good action and string height, but it’s not only the truss rod, it’s also the bridge that affects the action.
But also remember that guitars are more than just mechanics and even robust electric guitars are sensitive to humidity, temperature and even altitude. If you are adjusting a new guitar, tune it to playing pitch and then wait a few days for it to get used to its environment.
When adjusting the truss rod, having tuned the guitar with an electric tuner, keep the tuner plugged into the guitar and use the rise or drop in pitch as indicated on its dial as a road map to your adjustment. If in doubt just adjust I slight increments every day rather than all in one sitting.
Step 3 - The Bridge
Like everything else on a guitar, it is all about balance and harmony and the bridge and the truss rod work in partnership; if you adjust one you may have to adjust the other. If your action is still high after adjusting the truss rod, lower your individual saddles until your strings buzz on the frets and then raise the saddle adjusters until the buzz is gone.
Step 4 - Intonation
If your guitar’s open strings are in tune but as you fret up the neck the tuning starts to go bad, it’s time to set your guitar’s intonation which requires a good tuner, a good ear and as always a new set of strings tuned to pitch. Each string and its 12th fret harmonic should ring at the same pitch but an octave apart. If the note at the 12th fret is flat compared to the open string you will have to move that string's saddle back, if sharp, you have to move it forward.
This can be a tedious process but is well worth the effort.
It is also worth noting that some strings have better harmonic balance than others so find a brand and a gauge that work for you and stick with them.
Step 5 - Pick Up Adjustment
The final consideration when setting up your guitar sound is the position of the pick-up. When it comes to adjusting your pickups, make the adjustment that works for you, the way you play and the sound you want. You don’t want the pickups too far away from the strings or the tone will become “muddy", too close may cause your strings to touch and buzz. Use the pick-up adjuster screws until you get the sound you are after. Yes, it is a lot to consider, if you are a beginner you may want to take it to the local guitar shop but guitar technicians are musicians too and will be happy to share their knowledge about how to get the best out of your guitar. And think of guitar set ups like tinkering with your favorite car, enjoy improving and modifying the sound, learn to love “getting under the hood” and exploring the sonic potential and take satisfaction in a job well done.
Leave a comment
Comments will be approved before showing up.